• Blog
  • Recipes
  • Supper Club
  • Parties
  • About
Menu

Fig + Berrie

Street Address
City, State, Zip
Phone Number
a gathering of recipes, party ideas, and pictures to inspire.

Your Custom Text Here

Fig + Berrie

  • Blog
  • Recipes
  • Supper Club
  • Parties
  • About

Garden Cake

December 6, 2018 Ally Wankier
Summer cake

I know it's been awhile since I've been on here but I'm trying to be better about that and share all the recipes I've been working on. This was another fun collaboration with Ella Newman and her wonderful photography skills, it was so much fun and this cake is just perfect for festive summer parties and celebrations. I think my favorite cooking of all is summer cooking, lots of things are growing begging to be used and its easy to make everything delicious. I love being able to carry a big feast out the back door and eat in the yard in the happy summer light where the sun doesn't leave till 9:00. I think this is the perfect cake to carry out after a delicious dinner on the patio and serve to your friends and family for the perfect sweet finish. With a strawberry rhubarb jam sandwiched in between layers of  soft cream and vanilla sponge cake topped with tons of berries its the perfect dessert to celebrate summers abundance. Once again the lovely Ella of ellanewmanphotography took these photos and they are just perfect, go check out her sight!

ellanewmanphotography-8.jpg
ellanewmanphotography-7.jpg

Strawberry Rhubarb Jam:

  • 5-6 stalks of rhubarb chopped

  • 1 basket of strawberries

  • Sugar

  • Fresh squeezed orange juice

Throw all your ingredients in a sauce pan with a bit of fresh orange juice and 1/2- 1 cup sugar, or more, depending on the sweetness of your strawberries. Cook over medium high heat until combined and softened. The rhubarb will take a little longer to soften than the strawberries. Overall it will probably be about 10-15 minutes of simmering to get it where you want it. Let it cool completely and refrigerate until ready to use. The jam will keep in the fridge for 3 weeks.

ellanewmanphotography-81.jpg
ellanewmanphotography-67.jpg

Sponge Cake (from the "Decorated" cookbook)

  • 8 oz unsalted butter

  • scant 1/3 cups caster sugar

  • 4 medium eggs lightly beaten

  • 2 1/2 cups all purpose flour

  • 2 1/2 teaspoons baking powder

  • 1/4 teaspoon salt

  • 4 oz whole milk

  • 1 teaspoon vanilla extract

Start by preheating your oven to 335 degrees, then begin to cream the butter and sugar till light and fluffy, about 3-4 minutes. Once it is creamed add the eggs slowly until combined. Sift all your dry ingredients into a clean bowl and then add half of the dry mixture to your butter mixture. Then add the milk and vanilla extract and finish by adding the last of the dry mixture. Mix till just combined. Cook in greased, cake pans until skewer comes out with only a few crumbs. For a normal 9 inch cake pan its about 30 minutes. 

Whipped Cream :

  • 2 cups whipping cream

  • 3 tablespoons powdered sugar or more depending on how sweet you like it.

  • 1 teaspoon vanilla

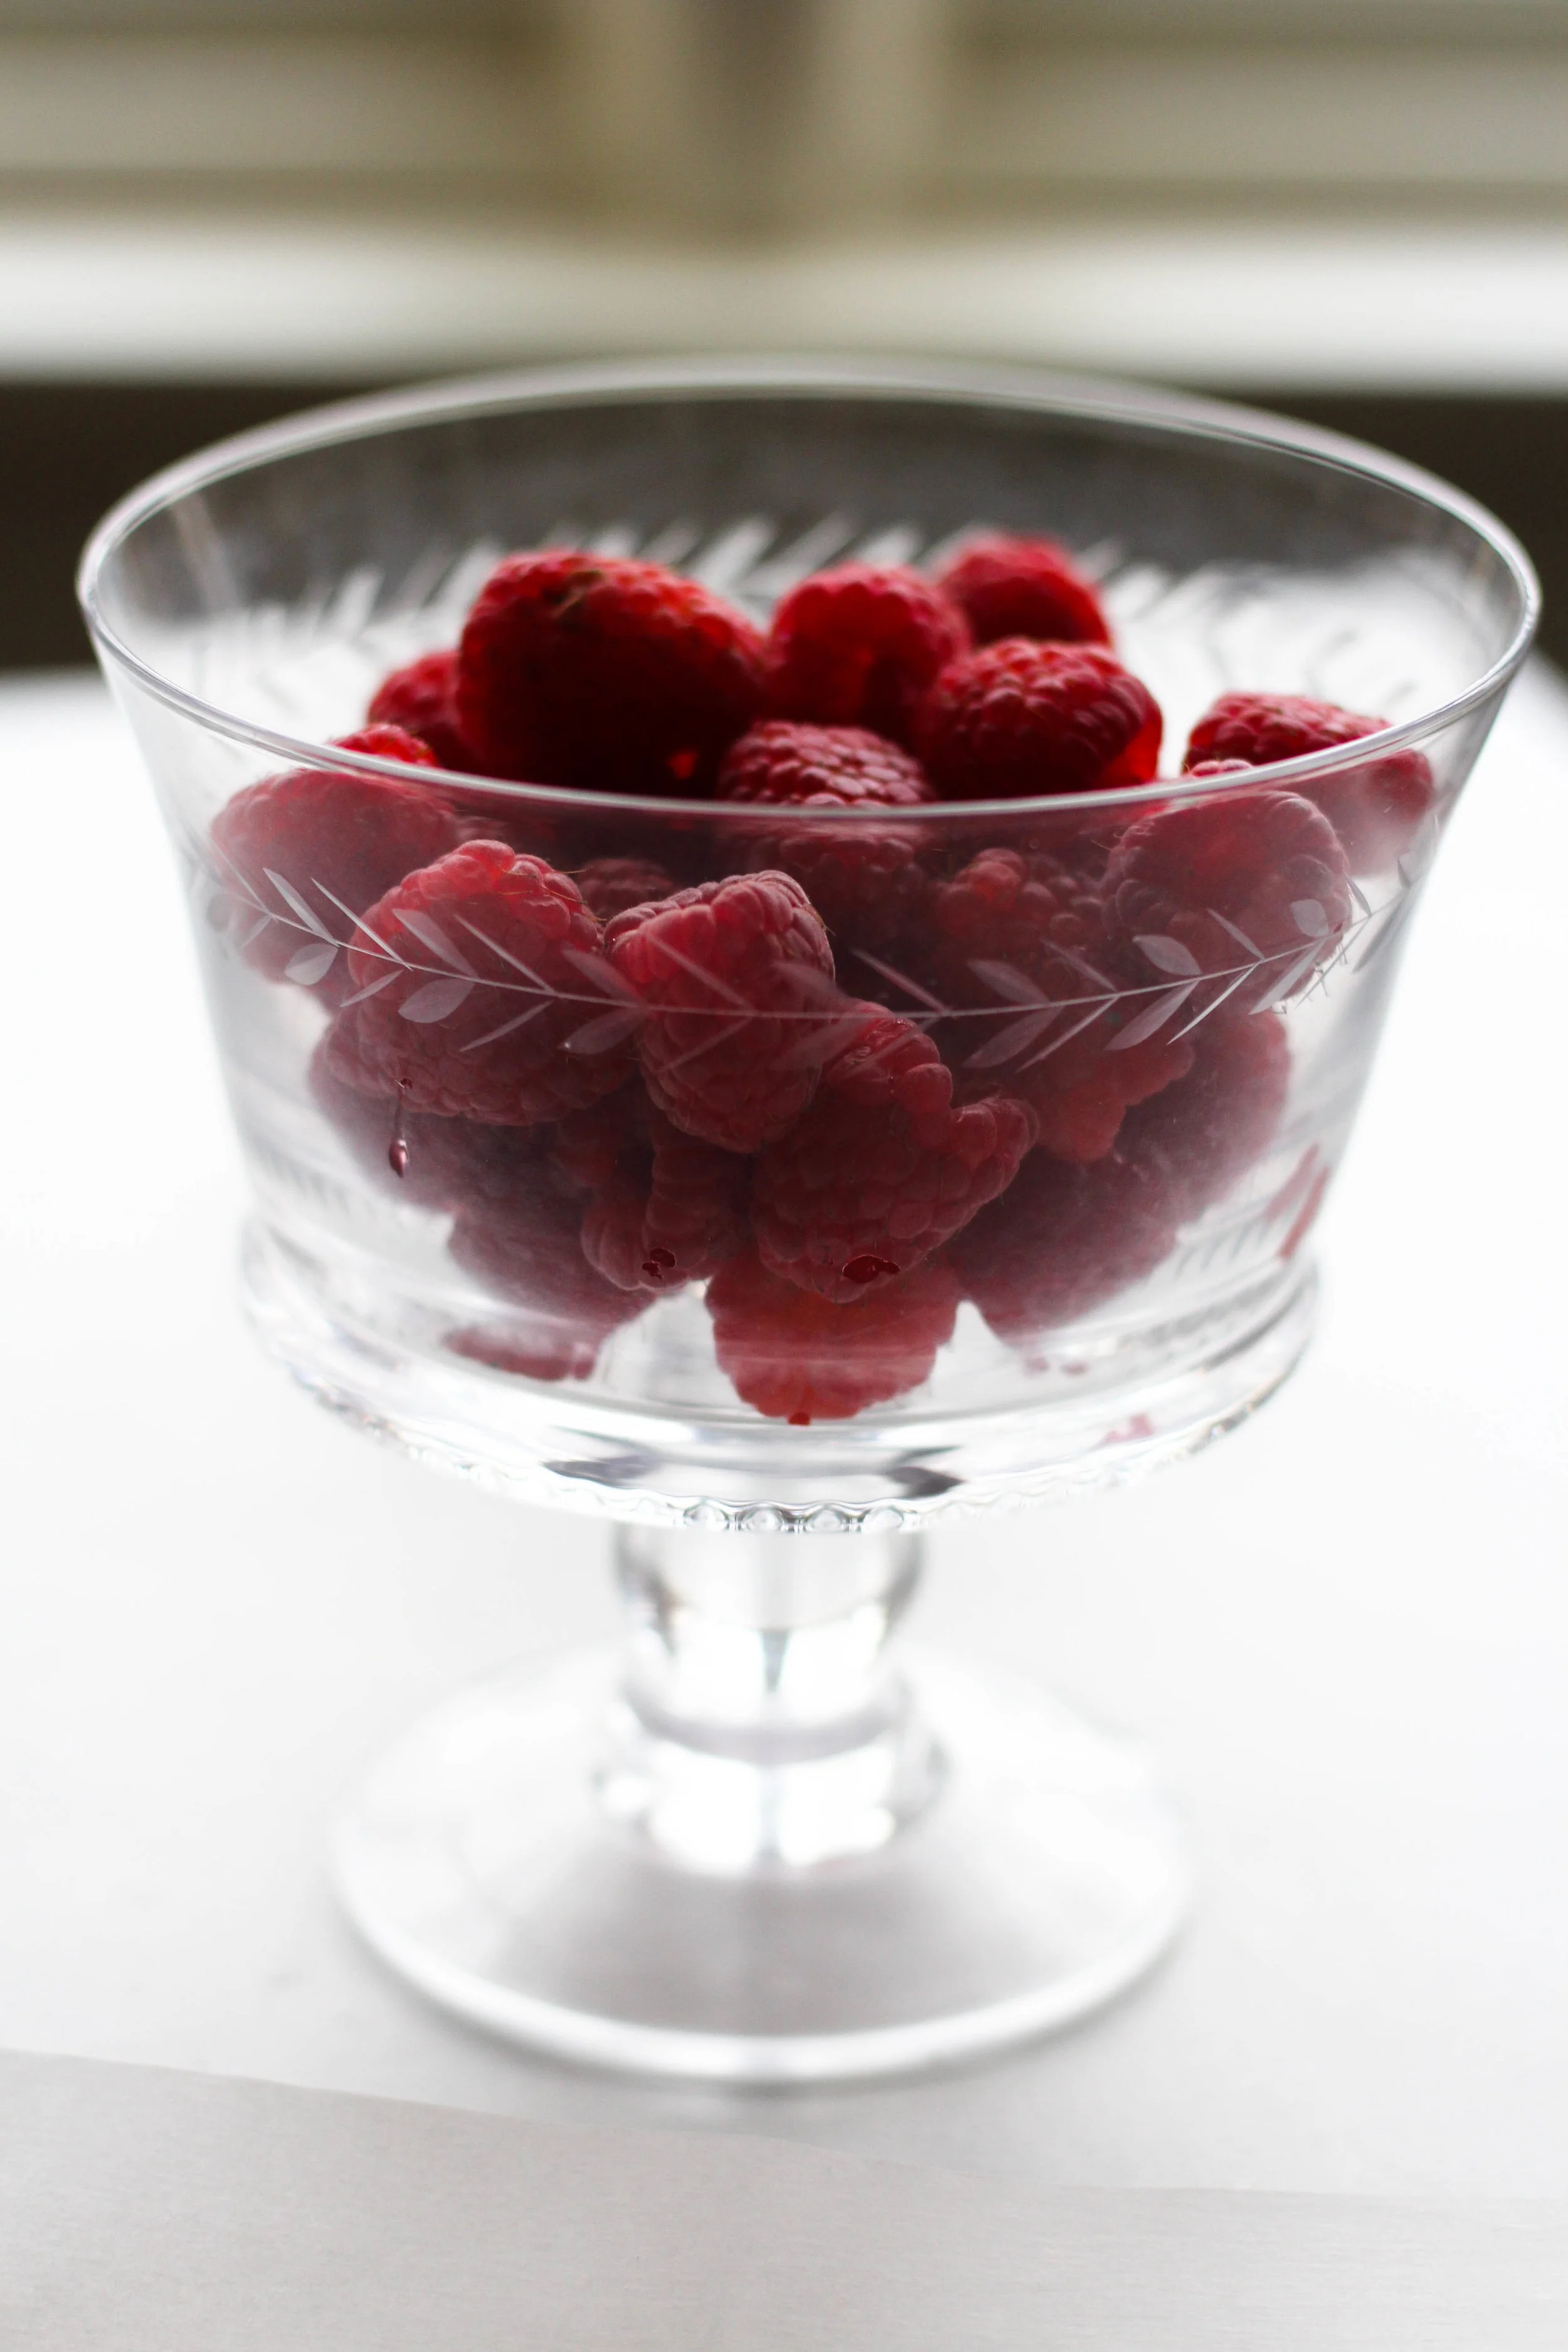
  • Fresh berries for decorating

Whip the cream until you have soft peaks and then stir in the sugar and vanilla and you're ready to pile it onto the cake.

ellanewmanphotography-75.jpg

To Assemble:

Cut your cake layers in half through the middle, I do this with a bread knife and a careful sawing motion, once they are completely cooled from cooking. Once they have been cut in half layer jam on the bottom half some cream on top and sandwich it with its top half. put cream in-between the two cake layers and then do the same with the jam and cream for the second sandwich. continue this pattern for as many layers as you have. Then top with remaining whip cream, let it flow down the sides and pile in delicious mounds for a relaxed look. Then cover it with berries, shove them wherever they will fit till its ready for a garden party!

ellanewmanphotography-80.jpg
ellanewmanphotography-73.jpg
ellanewmanphotography-59.jpg
In recipes, sweets Tags recipes, dessert, cake, summer
Comment

Chocolate covered Raspberries

February 1, 2018 Ally Wankier
raspberryfinal.jpg

One of my favorite memories is the summer vacations my family would spend in Bear Lake (an amazing crystal blue lake that lays across the boarder of Utah and Idaho). We'd go with my whole extended family to our grandparents condo and spend the days playing in the lake and eating good food. One of the best things about Bear Lake was their amazing raspberries. We couldn't go without getting baskets of raspberries, famous raspberry shakes, and the best chocolate covered raspberries! In my mind a chocolate dipped raspberry is a thousand times better than a chocolate dipped strawberry. You can pop the whole thing in your mouth at once and its juicy and sweet - and you won't be able to stop eating them! So with these happy memories in mind and Valentines Day coming up, I thought this would be the perfect treat to celebrate the holiday, and its so easy. I don't even know if you can call this one a recipe, but all I know is that they're delicious!

raspberry2.jpg
raspberry5.jpg

Alright, so these are so easy to make and can be ready in no time at all. They are perfect for Valentines gifts for family, just pop a few in a cellophane bag with a pretty ribbon and you're done. 

What you need: 

  •  6 oz. chopped Chocolate (semi-sweet or milk).  Bear Lake always had milk, I did these with semi-sweet. I like them both ways!
  •  1 pint Raspberries 
  • Optional: white chocolate for drizzling or sprinkles for decorating. I just like them plain and simple.
raspberry6.jpg

The rest is really easy. 

1. Melt your chocolate. Now this is probably the most technical part, since technically the chocolate needs to be tempered to maintain its pretty sheen. I use a really easy method that hasn't failed me yet. I learned this from Ina Garten, but lets be honest, that is where most all my food knowledge originates from! 

2. Here's what you do. Put 4 of the 6 oz. of chocolate in the microwave and cook it in 30 second intervals until almost melted. It usually just takes me 2 intervals, for a total of 60 seconds. Then, add the last 2 oz. of chopped chocolate into the already melted chocolate and stir till everything is completely melted and combined. This ensures that the chocolate doesn't get too hot and end up drying with that ugly dusty grey color. This microwave method hasn't let me down yet!

3. Now, the raspberries. Wash them and make sure they are completely dry. I like to sometimes get organic raspberries so I don't have to worry about washing them as much, because you want the raspberries nice and dry so the chocolate will stick.

4. Now, for the dipping. I dip with a fork so I can lift the raspberry up and the chocolate can drain off. Then I set them on parchment paper to dry and just keep dipping. They dry really fast and are ready to eat in no time! 

5. Storing. They will keep for a few hours just sitting out, or a couple days in the fridge....(but, I doubt they'll last that long!!)

raspberry3.jpg
raspberryfinal2.jpg
In sweets, recipes Tags holiday, chocolate, valentines, recipes, sweet
Comment

Baked Mushroom Mac and Cheese

January 10, 2018 Ally Wankier
Edited Mac and Cheese.jpg

There's nothing like the cold, dark month of January to make you feel uninspired when it comes to making dinner. That's why quick cozy meals like baked pasta are a go to for me. This baked mac and cheese is simple and quick to put together and can be on the table in thirty minutes. It's delicious and creamy and full of sautéed mushrooms and white cheddar cheese so it feels just a little sophisticated. Nothing like cozying up with some comfort food and your favorite show to make the month of January a little easier.

IMG_7622.jpg
IMG_7676.jpg

This is really a very simple recipe with only a few ingredients, but it seems like fancy mac and cheese with the addition of mushrooms and white cheddar cheese. 

Mushroom Mac and Cheese

Serves 6

1 1b elbow macaroni pasta 

salt (for pasta water)

5 oz sliced mushrooms or about half the container

3 tablespoons butter

1/4 teaspoon garlic salt

  • Creamy Cheese Sauce

1 stick butter 

1/2 cup flour 

2 cups whole milk 

1 1/2 teaspoons salt (more if needed)

1 teaspoon pepper (or more depending on taste)

1/4 teaspoon ground nutmeg 

6 oz  grated white cheddar cheese (you can also just use a sharp yellow cheddar if you can't find white.)

1/2 cup shredded parmesan cheese (for making that golden crispy top)

IMG_7661.jpg

To start, get your water boiling with a good sprinkling of salt for the pasta. Once the water has come to a boil add your pasta, stir occasionally and cook until just done, or a little al dente. About 12 minutes. While the pasta is boiling you can start your white sauce. This is just a basic béchamel recipe, which is a classic french sauce that goes back many, many years. You start by making the rue: put your butter in a pan over medium heat and let it melt. Once the butter has melted, add your flour and cook for about two minutes. Stir constantly until you have a homogenous paste. You can then add your 2 cups of milk, stirring with a whisk to avoid lumps. Once the rue is incorporated you can move to a wooden spoon. It will thicken up very quickly within about 3-5 minutes. Just stir frequently so the bottom doesn't burn. You want it to be thick enough to coat the back of a spoon as shown below. Then turn the heat off. Add your salt, pepper and nutmeg off the heat. At this time, its probably time to drain your pasta, so do that and then place it back in the pot.  Now add your grated cheese to the white sauce and stir till it is just melted. This is why you want your cheese already grated, so you can add it while the sauce is still nice and hot. Taste for seasoning and add more salt if needed, I love salt so I usually always add a bit more for good measure! 


IMG_7634.jpg
IMG_7638.jpg

Photo 1: White sauce is done and ready for cheese to be added!!

Photo 2: Cheese has been added, just stir until its melted and no lumps remain!

  • Sautéed Mushrooms 

Half of a box sliced button mushrooms (about 4-5 oz)

3 Tablespoons butter 

1/4 teaspoon garlic salt 

1/2 teaspoon dried parsley (optional)

Pour the cheese sauce over your pasta and let it sit in its pot while you prepare the mushrooms. Slice the mushrooms, if they aren't already sliced. Melt butter in a small sauté pan and add mushrooms. Cook at medium high heat for about 5 minutes or until mushrooms are cooked through. Add your garlic salt and parsley  and then toss the mushrooms straight from their pan into the pasta. Stir to combine. Now you've almost made it. Finally pour the pasta mixture into a 9x13 pan and top with a half cup, (or more) of grated parmesan cheese. Bake at 375 for about 15-20 minutes, or until the top is brown and a bit crispy. Don't let it go too long or it will dry out the pasta underneath the crispy top. That's it, dinner is ready, try not to eat it all in one sitting!

IMG_7660.jpg


In recipes, savory Tags main dish, winter, comfort food, recipes
Comment

Bridal Tea

August 9, 2017 Ally Wankier
ellanewmanphotography-5374.jpg
ellanewmanphotography-5381.jpg

I was able to throw a wonderful bridal tea, for a cute friend of mine and it was so fun to pull out all of the tea cups and vintage dishes I've collected over the years. I had wonderful ellanewmanphotography take these pretty pictures because she is just the very best! I thought I'd  post these pretty pictures on the blog and give you all a few tips and tricks for throwing a tea party as well as some of my favorite recipes.

ellanewmanphotography-5395.jpg
ellanewmanphotography-5383.jpg

The Menu 

For the menu I wanted to do something special. I wanted it to feel like a real tea straight from London, and so besides the fact that it was 90 degrees and we didn't have actual tea. I tried to get the food spot on! 

  • Cream scones with butter and jam and lemon curd
  • Curry chicken salad sandwiches 
  • Cucumber tea sandwiches 
  • Roast beef horseradish sandwiches with watercress 
  • Mini caprese kabobs
  • Chocolate "petite fours" 
  • Mini mille fuille with raspberries and lemon
ellanewmanphotography-5412.jpg
ellanewmanphotography-5405.jpg
ellanewmanphotography-5411.jpg

A few of my favorite recipes from the day were definitely the scones, the baby mille fuilles and the curry chicken sandwich!! 

For the Scones: This is a great recipe I got from a cute friend who is from England, these are the scones she grew up making with her dad. I've doubled the recipe because it makes a very small amount.

  • 2 cups flour 
  • 4 teaspoons baking powder 
  • 4 oz cold butter cut into cubes 
  • 2 large eggs
  • 3/4 cup milk 
  • pinch of salt 

In a stand mixer combine the flour, baking powder and salt add the butter and mix until it is like coarse sand, with pieces of butter still visible. In a separate bowl mix the eggs and milk together before adding them to the flour mixture. Mix until just combined, it should be a fairly wet dough. Try to handle as little as possible, turn it out onto a floured surface and pat out to about 1/2 inch thick you can cut them into triangles with a knife or use a round cutter like I did. Place them on a baking sheet and brush with milk. Bake at 425 degrees for 10 minutes or until they have risen and are just turning golden. 


For the chicken curry sandwich I used Ina Gartens recipe it is so delicious you can find it here. I then simply put the chicken salad onto a good white bread and cut into little soldiers. I got about four tea sandwiches out of one normal sandwich.

ellanewmanphotography-5390.jpg
ellanewmanphotography-5410.jpg

The Mille Feuille was super easy but looks very impressive and is so fun to serve to your friends. Here is what you will need:

  • store bought puff pastry 
  • store bought lemon curd 
  • raspberries
  • softly sweetened whipped cream 
  • powdered sugar 

To start thaw your pastry in the fridge overnight. Roll out one of the 2 pieces and cut into even squares, I tried to get about 12 so 3 across and 4 down but its alright if they aren't perfect. Place them on a baking sheet lined with parchment. Then put another piece of parchment on top and another sheet pan to keep them nice and flat. Bake in a 350 degree oven for about 15 minutes but watch them because they can go brown quickly without you even seeing. Do the same with the next piece of dough so that in total you will have 24 pieces for 12 mille feuille. Once the pastry is cool you can assemble. Spread lemon curd on the bottom 12 pieces along with a small amount of whipped cream and then top with 2 raspberries. Spread whipped cream on remaining 12 top pieces and then place them on top of the raspberry pieces. Place onto your tray and dust with powdered sugar. 

ellanewmanphotography-5412.jpg
ellanewmanphotography-5417.jpg

The Table

When I was planning the table I wanted to start with a neutral base and then just build off of that. I used liberty of london paper products which are always so darling and appropriate for a garden tea. Then I used vintage plates and goblets I have collected with my mom over the years from second hand shops. That was about it, I used mismatched tea plates and saucers to hold jam and butter and the table was ready for a party. 

ellanewmanphotography-5376.jpg
ellanewmanphotography-5420.jpg

This was such a fun party to host and a great excuse to use all my vintage wares. Happy Wedding Lillian!!

In Parties, recipes, savory Tags summer, garden, party, recipes, main dish
Comment

Strawberry Shortcake

May 10, 2017 Ally Wankier
IMG_7483.jpg
IMG_7338.jpg

Spring is the most exciting time of year. Everything comes back to life and it's finally strawberry season. A ripe strawberry is so delicious and perfectly sweet you don't need to do one thing to it. So what a better way to enjoy that strawberry than sandwiched between a biscuit with loads of whip cream? This is the perfect dessert to serve for mothers day. It's festive and fun, but super easy, and the fresh fruit does all the talking. 

Shortcake Biscuits

makes 8 round biscuits

2 1/2 cups flour

2 teaspoons baking powder

1 teaspoon salt

1 stick cold butter cubed 

1 lightly beaten egg

1/2 cup cold heavy cream ( plus an extra tablespoon or so if dough seems dry)

raw turbinado sugar for sprinkling

4 cups of sliced strawberries 

4 tablespoons sugar ( helps them to macerate and create a good sauce)

To start, slice your strawberries and mix them with the 4 tablespoons sugar. Set them aside and give them time to sit in their own juices while you make the biscuits. To make the biscuits put the flour, baking powder, and salt in a mixer and combine. Add your cold cubed butter a few pieces at a time with the mixer on low, (you could also cut the butter in by hand with a pastry cutter). Mix until it looks a little like sand and the butter is the size of peas. Add your beaten egg and cream and mix until just combined. It should be a little on the dry side, but still come together, if not add a couple tablespoons cream. Pat the dough out on a lightly floured surface keeping it a fairly good thickness and cut your biscuits out with a round cutter or a drinking glass. Be sure not to turn your cutter back and forth as you cut or it will prevent them from rising as high.

IMG_7371.jpg
IMG_7378.jpg

You should get 8 biscuits out of your dough. You will probably need to roll it out twice for the right thickness for about 4 biscuits per time. Try to do it quickly so you don't handle your dough too much and melt the butter. Place on an ungrease cookie sheet and top each one liberally with turbinado sugar. If you want to ensure more of a shine you could also brush each biscuit with a beaten egg. Place them in a 400 degree oven for 20-25 minutes. When they come out transfer them to a cooling rack while you whip the cream. 

IMG_7401.jpg
IMG_7405.jpg

Vanilla Whipping Cream 

1 1/2 cups whipped cream 

1/4 cup powdered sugar 

1 teaspoon vanilla 


Whip the cold cream until soft peaks form.Stir in the powdered sugar and vanilla and serve immediately on-top of the strawberries and biscuits.

Building the shortcakes

1. Cut each biscuit in half with a sharp serrated knife.

2. put a small bit of cream on the bottom half of each biscuit

3. pile about a half cup of strawberries on each shortcake

4. Top with more cream!!

5. Place the top half of the biscuit on the layer of cream and serve.

IMG_7412.jpg
IMG_7475.jpg
In sweets, recipes Tags dessert, mothers day, holiday, recipes
Comment

Valentines Brunch

February 13, 2017 Ally Wankier
ellanewmanphotography-3791.jpg
ellanewmanphotography-3825.jpg

Well, Valentines is tomorrow but that doesn't mean you can't have a pretty little brunch any day of the year. I had the most fun day with Ella Newman - she takes the prettiest pictures, which you can see more of here. We got together for a quick Valentine's shoot and ate chocolate waffles and citrus salad, and chatted about life - and it really was the best time. I am so happy because now I have these beautiful pictures to post all thanks to her skills behind the camera. I've always loved Valentines day, I think it's such a bright happy holiday in the middle of bleak winter. I really can't think of anything better than celebrating it with pretty dishes and sweet treats. So go grab the people you love and make them some chocolate waffles, because who wouldn't want those?

For this little brunch I did a simple, super sweet menu. There were plenty of chocolate waffles, a yummy citrus salad, and some sparkling pink lemonade. If you wanted to add some real food in there, or add a little protein, a frittata or some scrambled eggs would be great! I used some pretty vintage pink glasses and these darling oval plates with gold rimming, both finds from a second hand store. Because, let's be honest, is it even a party without pretty dishes? 

Chocolate Waffles

- 1 stick butter

- 5 tablespoons cocoa

- 4 eggs

-1 1/2 cups sugar

-2 cups flour

-pinch of salt

-1 teaspoon vanilla

To start, melt your butter and mix in cocoa until combined. Next, whisk each egg into the chocolate mixture and then add the sugar. Finally, add the flour and salt until just combined, then add the vanilla. Heat your waffle iron to high and spray with non stick spray. Put a tablespoon (or up to 3) of batter in the iron,  depending on the size of your waffle maker. Cook depending on waffle maker directions and eat warm with soft whipped cream and chocolate sauce!  

ellanewmanphotography-3739.jpg
ellanewmanphotography-3749.jpg
ellanewmanphotography-3756.jpg

Ok, now we have the citrus salad. I think this was my favorite part of the day. You forget how good fresh citrus is and how pretty it is. I just can't get over those colors! This isn't even a recipe - all you need is some sea salt, citrus, and olive oil and you're good to go!

Citrus Salad

- 1-2 grapefruits, peeled and sliced

-1-2 oranges, peeled and sliced

-1-2 blood oranges, peeled and sliced

- sprinkle of Maldon sea salt

- 2-3 tablespoons of olive oil

Alright, so all you do is slice the citrus, drizzle the oil, sprinkle some sea salt and eat. Yum!

This was such a fun day - go look at Ella's beautiful website to see more photos of this pretty day, then make these recipes - you will not regret it!  Happy Valentines Day! 

ellanewmanphotography-3766.jpg
ellanewmanphotography-3787.jpg
ellanewmanphotography-3780.jpg
In recipes, Parties, breakfast Tags breakfast, waffle, recipes
Comment

Chocolate Mendiants

December 15, 2016 Ally Wankier

I have wanted to make these little chocolate treats for years and just have never gotten around to it. So, finally this year when I saw them in Bon Appetite Magazine I decided I was going to do it. They were so simple and fast I wondered why I'd never made them before. These little traditional French treats are simply melted chocolate shaped into a small circle and topped with fruit, nuts, candied citrus and pretty much anything you can think of. I think of them as your own individual chocolate bark, each bite can be tailored to have exactly what you like on top. I had to do some with peppermint on top because I love the festive look and peppermint bark is always a holiday staple. But, I have to say the traditional fruit and nut combination is pretty perfect. The salty and sweet with the rich chocolate, it's the perfect bite for after a large holiday dinner. I also felt like I had to make these, because what perfect neighbor gifts! They are beyond simple to make and look super pretty/ fancy in a little paper bag tied up with festive string. I think there is nothing better than a homemade treat. So if you're in a pinch this holiday or need something delicious in a hurry these little guys are just for you!

IMG_7018.jpg
IMG_7050.jpg

Chocolate Mendiants

-makes 30-35 candies-

8 oz. good chocolate (I use ghiridelli 60% or 70% baking bars)

chopped pistachios

pecan halfs

dried cranberries

sunflower seeds

cashews

rasins

crushed candy canes, dried fruit, nuts, candied ginger, sea salt, anything you want!

Melt your chocolate in a double boiler or in the microwave in 30 second increments till almost melted. Then stir chocolate till smooth and the heat of the melted chocolate has melted all remaining chocolate pieces. Lay a sheet of wax paper across a cookie sheet. Spoon dollops of chocolate onto the wax paper and spread into a circle just larger than a quarter. Continue till you've filled the sheet and then sprinkle each with toppings of your choice. I recommend leaving the peppermint alone, it's best by itself. Mixing the nuts and fruits is really delicious! After they all have their topping pop them in the fridge to harden for at least an hour, but they can be kept for 4 days in the fridge before serving. Peel off the wax paper and enjoy with a warm drink! 

Happy Holidays!! 

XOXO

In sweets, recipes Tags recipes, holiday, chocolate, christmas, candy
Comment

Walnut Pear Sour Cream Torte

November 20, 2016 Ally Wankier

This recipe is one of my moms very favorites, she tore it out of a magazine years ago and it has been a classic ever since. It's so delicious and not too sweet, it comes together quickly but it looks so impressive. This recipe takes a few steps but once you've made all the pieces it is easy to assemble, and always bakes up perfectly. With Thanksgiving just days away I think this is the perfect cake to add to your mix of classic pies! I am all about too much of everything on Thanksgiving, so besides your classic pumpkin, apple, and pecan pies add in a pear torte for absolute gluttony. Happy Thanksgiving!

Walnut Pear Sour Cream Torte

1 cup chopped walnuts

1/3 cup packed brown sugar 

1 tsp ground cinnamon 

1/4 cup butter 

1/3 cup ap flour 

2 medium pears, sliced and peeled (about 2 cups)

2 tsp lemon juice 

1 3/4 cup ap flour

3/4 tsp baking powder 

1/2 tsp baking soda 

1/4 tsp salt 

1/2 cup butter soften 

1 cup sugar 

1 tsp vanilla 

2 eggs 

1 cup sour cream 

IMG_6823.jpg
IMG_6826.jpg

To start, preheat oven to 350 degrees. Grease a 9 inch spring form pan. Combine the 1 cup nuts, brown sugar and cinnamon in a small bowl. For topping cut the 1/4 cup butter into the 1/3 cup flour to make course crumbs and stir in 3/4 of the nut and sugar mixture. Set the topping aside. Slice your pears and toss with lemon juice and set aside. In a medium bowl combine the 1 3/4 cups flour, baking powder and baking soda and salt and set aside. In a large bowl beat 1/2 cup butter and sugar until light and fluffy, add in the eggs one at a time and the vanilla. Next, add the flour mixture to the butter mixture alternating with the sour cream beat after each addition until just combined. Spread 2/3 of the batter into the pan and then sprinkle the 1/4 remaining sugar and nut mixture over the batter. Layer the pears over top and then gently spread the remaining 1/3 of batter over the pears. Sprinkle the crumble topping over the batter and bake for 45-55 minutes or until a toothpick comes out clean. Let cool for 10 minutes before removing from its pan and serve warm or cool with whipped cream. 

IMG_6736.jpg
IMG_6899.jpg
In recipes, sweets Tags dessert, holiday, recipes, thanksgiving
1 Comment

Alex Guarnaschelli's Parker House Rolls

November 11, 2016 Ally Wankier

This is a recipe I've been dying to try since last Thanksgiving, finally about six months after Thanksgiving I tried it for a fancy Sunday dinner. Holy Cow they are so good I want to die! They are just delicious little salty, buttery puffs that you just want to keep eating. So, anyway, I wanted to put these on the blog for you all to try, before Thanksgiving comes around again this year. To me these would be the perfect roll for your Thanksgiving table. I don't know why I'm surprised most everything Alex Gaurnaschelli makes is full of butter and always delicious, so I didn't alter the recipe one bit it is pefect as is. One bite of these rolls will throw you right into the Holiday season.

Parker House Rolls by Alex Gaurnaschelli

1 packet active dry yeast 

1/2 cup warm water 

1/2 cup sugar 

12 T. melted butter 

2 cups whole milk at room temperature 

2 large eggs

1 T. salt 

7 1/2 to 8 cups ap flour

to start pour yeast into bowl of your stand mixer and add 1/2 cup warm water and 1 tablespoon of the sugar. Let this sit for 10 minutes or until it is foamy. Next, beat in 3/4ths of the melted butter, the rest of the sugar, milk, eggs, and salt. Now turn your mixer to low and add the flour 1 cup at a time, when you get to 7 cups add in small amounts until the dough is able to make a nice ball around the dough hook. Realize you probably won't need 8 cups, I used about 7 and 1/4 cups. Now you wait, put some of the reserved butter in the bottom of a clean bowl and place the dough on top of the butter. Cover the bowl with plastic wrap or a towel and let raise in a warm place for 1 1/2 to 2 hours. Now comes the fun part.

IMG_6618.jpg
IMG_6621.jpg
IMG_6637.jpg
IMG_6661.jpg

Preheat your oven to 375 degrees

1. Roll your dough out onto a floured surface and pat into a 9*16 rectangle (use a ruler).

2. Cut the rectangle into 3 strips lengthwise and then crosswise into 12 strips.

3. Fold each strip in half unevenly, so the top piece overlaps the bottom, fold that overlapping piece over and place it seam side down on a parchment lined baking sheet.

4. Place the rolls on the baking sheet in rows of 9 so they are just touching each other. You will have 2 baking sheets with 2 rows of 9 rolls each. 

5. Bake for 18 minutes at 375 degrees rotating half way through. Brush with remaining melted butter and sprinkle with sea salt immediately.

You can serve these right when they come out of the oven, or rewarm them for about 8 minutes in a 350 degree oven. You can also freeze the formed rolls before they are baked. They are perfect for a busy Thanksgiving day of cooking.

IMG_6667.jpg
IMG_6680.jpg
In recipes, savory Tags bread, rolls, recipes, side
Comment

Pear and Cranberry Turnovers

October 15, 2016 Ally Wankier
IMG_6418.jpg
IMG_6344.jpg

There's nothing like Fall to get you in the mood to bake all the things! I think it has to be one of my favorite seasons... I say that about every season, but really, Fall is up there. So, with these cold, wet days we've had lately I am in the mood for cozy, warm treats. These turnovers are just that, cozy and warm. Do you remember those cherry turnovers that came in a little box in the dairy section you could buy and they would puff up so pretty in the oven and then you would drown them in the packet of white sweet icing? Anyone?? Well anyway, my mom used to make those for me and my brother when we were little, and then one day they disappeared. So in honer of that memory, here are some turnovers that remind me lots of those, but with Fall flavors. They are so easy, with a ready made dough, so all you have to do is make the filling. Also, pears....  I always forget how delicious they are until I eat one again - they are so good! The cranberries are so pretty and add that cherry taste/feeling I remember from my childhood. All in all, these are delicious and could be making your kitchen smell like Fall in no time. 

IMG_6293.jpg
IMG_6276.jpg

Pear and Cranberry Turnovers

-makes 12 turnovers

  • 3-4 ripe pears 
  • 1/3 cup cranberries 
  • 1/3 cup sugar
  • 2 tablespoons brown sugar 
  • 1/4 cup water 
  • 1 teaspoon cinnamon 
  • pinch of salt
  • 1-2 tablespoons flour
  • frozen puff pastry 
  • 1 egg

Glaze 

  • 1 cup sugar 
  • 1-3 tablespoons of milk 

To start, preheat your oven to 375 degrees and peel your pears, then cut them into bite size pieces. Remember, if the pears are too big they won't fit in the turnovers. Throw the pears in a pan with the cranberries and add the water and sugar. Cook over medium high heat for about 5 minutes, then add the cinnamon and salt and cook for another 5-10 minutes. Stir often, until the pears are just softened. Lastly, stir in the flour and turn heat to high. It should take just a couple minutes before you see the juices thickening into a syrupy sauce, then turn off the heat. Let the filling cool while you unfold your pastry and prepare the dough. When you unfold the pastry it will be a rectangle shape. Cut about an inch or two off the top so the dough is a square, then cut it into 3 strips vertically and in half across so you have 6 little squares to fill. Then, spoon a tablespoon or so of filling into each one, fold diagonally and crimp with a fork. 

Set your turnovers on a baking sheet. I usually do 6 to a sheet just so they have room to puff. You will need both sheets of puff pastry to make the total twelve. Whisk your egg up with a few drops of water and brush it liberally over the tops of the turnovers. Bake them in an oven at 375 degrees for 18-20 minutes, or until golden brown.

Once they are out of the oven, wait 10 minutes before glazing - if they are too warm, the glaze won't stick. To make the glaze, just mix your sugar and milk. Add just a tablespoon of milk to start and keep adding until its just combined. You are going for a thick glaze, so don't add too much milk. Also, in my opinion, the more glaze the better, just like when I was a kid... (Now eat immediately, while they are still warm and gooey on the inside!) You will have extra filling, which is great over ice cream, pound cake, or just eaten with a spoon!

IMG_6374.jpg
IMG_6418.jpg

*** A note about puff pastry- you can find it in the frozen foods isle. I always use Pepperidge Farms brand. It comes with two sheets of pastry that have to be thawed overnight in the fridge, or I set it out on the counter a few hours before I make something to thaw a little faster. It's a great easy dough that is my 'go to' when I need flakey layers of puffy, buttery goodness! 

In recipes, sweets Tags fall, dessert, fruit, hand pies, recipes
Comment

Springtime Salad

March 15, 2016 Ally Wankier

Spring is in the air! There is nothing better than the feeling of warming up after a long winter, which is why spring is my favorite season...although I kinda say that when every season comes along so don't hold me to that! Spring really is particularly exciting though because the garden comes back to life!!! All of the sudden you have so many fresh ingredients to work with, this salad is a celebration of everything fresh and spring. This is a variation on a salad I make all the time as it warms up. My favorite part is the micro greens they are so yummy and different than your everyday lettuce. This is the perfect salad to serve with your Easter dinner or anytime at all!

IMG_5291.jpg
IMG_5293.jpg

You can whip this salad up in no time it just takes a few ingredients and you're good to go!

Springtime Salad

  • 1 box mixed micro greens (I've found these at Harmons)
  • A few handfuls of mixed greens 
  • 1/2 cup thawed frozen peas or fresh 
  • 3 sliced radishes
  • 1/3-1/2 cup crumbled feta cheese 

First, throw your greens in a bowl and then I like to start to layer it with all the pretty stuff. Start with thinly sliced radishes, then sprinkle your peas over the top and lastly the feta cheese. Sometimes I'll add scallions or slivered almond to finish for extra flavor but it's perfect just the way it is. For dressing you can either do a squeeze of lemon with olive oil, or any of your favorite bottled vinaigrettes, but my favorite thing to do is just a drizzle of balsamic vinegar and olive oil! Toss your salad gently and enjoy immediately!


In recipes, savory Tags salad, spring, easter, recipes
1 Comment

Winter Tomato Soup with Giant Croutons

February 4, 2016 Ally Wankier
IMG_4508.jpg
IMG_4523.jpg

All my life I've been extremely annoyed with croutons. To me they were obstacles in my salad that were hard, tasteless, and couldn't be picked up with a fork. This changed one day when I had the biggest, fluffiest crouton of my life. I was at a restaurant and ordered the caesar salad, when it came out it was topped with 3 giant cubes of sourdough bread that had been toasted to a golden brown perfection on each side. It was like bread heaven, and instead of being hard little obstacles they we crispy on the outside and warm and soft on the inside...those were a crouton I was ok with. So anyway, when I was thinking of what to make on this dreary winter day, I though of those comforting croutons and knew I had to try and recreate them. Instead of salad I thought they would be nice to top a warm soup. I thought about how I could create a decent creamy tomato soup without the produce of summer and this is what I came up with. Canned crushed tomatoes, enhanced with butter, onions, and garlic, some fresh rosemary and parmesan cheese. It turned out pretty good and really hearty for a cold winters day. 

Winter Tomato Soup

-serves 4-

2 tablespoons butter

1 tablespoon olive oil 

1 small yellow onion 

2 cloves garlic; minced 

1 sprig rosemary 

2 inches of parmesan cheese rind

1 1/2 cups chicken broth

28oz can crushed or pureed tomatoes 

salt and pepper

1/2 cup heavy cream 

To start, chop up your onion to a fine dice and melt the butter and olive oil in a pot over medium heat. Let the onion sweat in the butter and olive oil for about 5 minutes and then add the minced garlic and rosemary sprig. Sauté for a few minutes more and then add your tomatoes and chicken broth, as well as the cheese rind. Stir well and let come to a simmer for at least 10 minutes, remove the rosemary. At this point, if you like, you can blend the soup in a blender or with an emersion blender to make extra smooth, just remember to remove the cheese rind. If small pieces of onion don't bother you, you can serve as is. Add salt and pepper to taste and, if you used a blender, pour back in the pot until ready to serve. Right before serving, turn off the heat and stir in the half cup cream. This will give it a silky decadent texture, and you're ready to serve with parmesan cheese and a large crouton on top!

Giant Croutons

1 baguette 

2-4 tablespoons of butter

sea salt 

fresh cracked pepper 

Slice your baguette into 1 to 1 1/2 inch pieces and heat a skillet to medium high heat with a good amount of butter. Place baguette pieces in hot pan and fry till golden brown on both sides. Sprinkle the top with coarse sea salt and black pepper and serve over your soup. **If you fry them in batches, be sure to add more butter each time so they get a good golden crust!


In savory, recipes Tags winter, recipes, soup, main dish
3 Comments

Birthday Popovers with Raspberry Butter

January 16, 2016 Ally Wankier
IMG_4359.jpg

One of my New Year's resolutions was to cook something new every week, whether it was a recipe i'd never tried before or one of my own creations. I'm hoping this goal will keep me out of a cooking rut, and keep creative ideas for new recipes flowing...we'll see how long this actually lasts! For this week it's my mom's birthday, and I happened to be trying out popover recipes. I've had a strange obsession with popovers since I was little and experienced them at a locally owned bistro with my mom called Zinn Bistro. It was family run, and the mom did all the cooking, and everything she made was so DELICIOUS! I can't even describe it, every bite was magic. To start your meal you would get a basket of bread, but not just any bread - it was all homemade and sometimes different depending on the day,... BUT the homemade popovers were always the very best part! They came warm with a bunch of raspberry butter, and even though that restaurant is now closed, the memory of the popovers will never leave me! Recently, I found Mimi Thorisson's recipe for Yorkshire pudding, which is basically a popover but with meat juices instead of butter or oil. I knew I had to try them because I love everything she ever makes, and when I did, they were delicious and a hit with my whole family. We couldn't get enough. I whipped up some raspberry butter and it was almost like my mom and I were back at Zinn Bistro, so it was only fitting that I made them once again to celebrate her birthday! 

IMG_4295.jpg
IMG_4317.jpg
IMG_4358.jpg

From Mimi Thorisson's blog, "Manger"

Recipe for Yorkshire Pudding or Popovers

*makes 10-12*

2 cups flour

1 cup whole milk 

2 tablespoons cold water 

4 eggs 

olive oil or meat juices (for Yorkshire pudding)

This recipe is so easy and the ingredients are things you almost always have in your house, so there is never a bad time to make popovers! For best results, use a popover pan, but you can use a muffin tin - they will just be denser and more like a German pancake. A popover pan insures they are airy and light on the inside, and crispy on the outside. You can find one here! 

To make your popovers, start with mixing your flour and milk and water together. Then add each egg one at a time and mix until incorporated. That's about it, once you've mixed it well and most the lumps have gone you're ready to bake! Set your oven to 400 degrees and pour just a bit of olive oil into the bottom of each tin, then set the tin in the oven for about 5 minutes, so the oil is nice and hot. Now you can pour your batter in, fill each cup about 3/4 full and bake for 20 minutes or until the tops are nice and golden brown. Serve warm with raspberry butter!

Raspberry Butter

1 stick butter 

 1/4 cup raspberry jam or more depending on how sweet you like it 

4 tablespoons powdered sugar 

Let your butter come to room temperature and then mash it and the jam together with a fork. Mix in the powdered sugar and serve. Add less or more jam depending on how sweet you like it!

IMG_4373.jpg
IMG_4332.jpg

HAPPY BIRTHDAY MOM!


In recipes, savory Tags side, recipes, breakfast
Comment

New Years Chocolate Truffles

December 29, 2015 Ally Wankier

Christmas has come and gone, and we have all probably had our fill of cookies, cakes, and sweets. But, the new year is just around the corner and you have to celebrate that with something sweet! I thought truffles were perfect, they're easy to make and a yummy small bite that's not too filling, and they look really fancy! I adapted this recipe just a bit from the cookbook Tartine it's a great book full of yummy pastry and cake recipes, all from the bakery in San Francisco. I changed mine up a bit with different topping to roll them in, so they would look like shinning gems on the new years table! I used chopped pistachios, cocoa powder, and powdered sugar! These truffles are basically like making a thick ganache and then just waiting for them to set in the fridge, so hardly any work and they look so pretty. These would be perfect to have on New Years Eve with some friends and a little bubbly cider!

CHOCOLATE TRUFFLES

makes about 20 truffles

8 ounces semi or bitter sweet chocolate 

1/3 cup heavy cream 

1 teaspoon corn syrup

2 1/2 tablespoons butter 

1 teaspoon vanilla extract 

powdered sugar, cocoa powder, pistachios or whatever you like

IMG_3912.jpg
IMG_3942.jpg

To start, heat the heavy cream and corn syrup over medium heat until it is almost boiling. While the cream is heating up, chop your chocolate into pieces, I usually use two 4oz. bars. Put your chocolate in a bowl and pour the hot cream over it along with the softened butter. Stir this mixture until the heat of the cream has melted all the chocolate and butter and it is smooth. Lastly, add your vanilla, then you need to wait for the chocolate to come to room temperature and firm up a bit. I usually just set mine in the fridge covered with plastic wrap for about 1 hour. After that 1 hour take your bowl of chocolate out and scoop little balls out with a small ice cream scoop, melon baller or just a tablespoon. Place the balls on a sheet tray, it should make 20 to 30 depending on the size of your truffle. At this point the truffle will still be pretty soft so put them back in the fridge for a couple hours or in the freezer for about half an hour until they're nice and firm. 

Once they come out of the cold they will look like the picture above and be fairly easy to handle. Dump a cup or so of chopped pistachios, powdered sugar or cocoa powder into a wide bowl or plate and then roll the truffles in the coating. You can roll the chocolate in your hands right before rolling them through the coating so the surface is warm and will stick to your toppings better. After you're done you can place them in small cupcake liners or just on a plate, and stick them back in the fridge until you are ready to serve. The truffles will last a week or two if kept in the fridge. 

I hope you have a happy new year and that these little guys make it to your celebration table!

IMG_3951.jpg
IMG_3915.jpg
In sweets, recipes Tags chocolate, recipes, holiday
Comment

Fourth of July Cherry Pie

July 4, 2015 Ally Wankier
IMG_0372.JPG

It's that time of year again, the wonderful month of July where summer is at its height and red, white, and blue is everywhere. When I was thinking of what to make for our annual fourth of July BBQ, it couldn't be anything other than a delicious fresh cherry pie! Pitting the cherries may be a labor of love but its all worth it once you see your family and friends faces as they eat this pie.

What makes this pie a special cherry pie, is its yummy cornmeal crust. The slight sweetness of the cornmeal compliments the sour cherries perfectly and it has a perfect texture that stands up to all those yummy cherry juices.

Cornmeal Crust 

2 cups AP flour 

1 cup yellow cornmeal

1 teaspoon salt

1 1/2 sticks cold unsalted butter, cubed 

1/4 cup ice cold water (plus a few extra tablespoons depending on how dry it seems)

To make the crust, combine all your dry ingredients in a stand mixer and mix on low just to combine. Begin adding your cold butter cubes and let it mix until the butter is the size of peas and the dough has a sand like texture. You can also do this by hand with a pastry blender, but I find the mixer is a little faster, and less messy! After your butter is at the right size, add your water with the mixer on low. It will seem dry but let it keep mixing and it should come together in a dry dough ball. If not, you can add a few extra tablespoons of water. Wrap your dough in plastic wrap and set it in the fridge while you make your filling.

Cherry Pie Filling 

3 1/2 cups pitted red cherries 

1/4 - 1/2 cups granulated sugar (based on the sweetness of your cherries)

1 teaspoon cinnamon 

squeeze of half a lemon 

2 tablespoons cornstarch 

Mix the sugar and cinnamon into your cherries and then add the lemon juice and corn starch. Stir a few times until all is combined and the lemon and cherry juice has mixed with the cornstarch. You can now take your dough out of the fridge, roll it out till its about half an inch thick, and lay it over your pie pan. Just pinch the dough with your fingers or you could also use the prongs of a fork to decorate the edge. Pour cherries into the crust and then you'll have just enough dough left over to make some fun designs on the top. I punched out stars and used some letter cookie cutters. You could adapt this to any holiday or celebration you have in mind. Brush your crust with a simple egg wash and bake at 350 degrees or until the crust is golden brown and the cherries are bubbly. It is an absolute must to serve this warm with cold vanilla ice cream. (But its delicious at room temperature as well.)

HAPPY FOURTH OF JULY EVERYONE.

In sweets Tags pie, fruit, holiday, recipes
3 Comments
Older Posts →

Hi, I'm Ally, author of Fig and Berrie. Thanks for visiting! 

Learn More
“People who love to eat are always the best people.”
— Julia Child

Follow on Instagram @figandberriekitchen

A bit of summer on this cold December day. I finally, about 6 months late, got this cake on the blog.🙈 So... merry Christmas, enjoy this sunny scene! ☀️🎄 .
.
.
.
.
. #figandberrie #cake #bonappetitmag #f52grams #christmasbaking #foodblog #foodblogf
Happy 4th of July!🇺🇸 here’s a pretty picture of a garden cake to celebrate! 📷: @ellanewmanphoto
.
.
.
.
.
.
. #foodandwine #food52 #bonappetit #foodblog #foodblogfeed #feedfeed #figandberriekitchen #figandberriesummer #fourthofjuly #summerfo
When my grandpa was a little boy his mom made these cookies for him. They have always been my grandpas favorite and my grandma has made them for him all through their marriage. My mom now makes them for my dad and our family, and we think they are pr
A delicious simple dinner/appetizer/snacking board is on the blog with an amazing green goddess dressing from the Tartine All Day cookbook! Link in profile✨
.
.
.
.
.
.
. #figandberriekitchen #foodblogger #foodblogfeed #eatmoremagic #f52grams #bonapp
I’m ready for spring! So a new recipe for a simple, healthy, springtime dinner is coming to the blog soon!
.
.
.
.
.
.
.
. #figandberriekitchen #foodblogger #food52 #f52herbs #foodblogfeed #bonappetit #feedfeed #foodphotography #foodie #foodand
Valentines is almost here💘 I’ve been looking back at this pretty shoot I did with @ellanewmanphoto and remembering these delicious 🍫waffles!! They are so easy and the perfect valentines treat. Link in profile✨❤️
.
.
.
.
.
.
. #figandberrie #f
I swear this is the last picture of raspberries! But these guys are officially up on the blog and the perfect Valentines treat.❤️💕❤️
.
.
.
.
.
. #food52 #foodblogger #buzzfeedfood #foodblog #feedfeed @thefeedfeed #foodblogfeed #bhgfood #countrylivin
It’s finally February! I thought we’d never make it. January felt like the longest month, so here’s a picture of berries to celebrate✨
.
.
.
.
.
.
. #food52 #foodblogger #foodphotography #foody #feedfeed #buzzfeedfood #marthastewart
One of my favorite memories is going to Bear Lake every summer and eating lots of chocolate covered raspberries! It was the best treat and something I never had anywhere else. So I decided to try and recreate them at home, and I can’t stop eati
This salad has been on repeat in our house since Christmas! It’s the perfect combination of flavors, and is now up on the blog! Link in profile✨🥑🍊
.
.
.
.
.
.#foodblogger #buzzfeedfood #food52 #foodie #foodphotography #foodandwine #feedfeed #

FEATURED RECIPES

Popovers
Popovers
Mint Slush
Mint Slush
Christmas Cake
Christmas Cake
Party Cheeseboard
Party Cheeseboard
You must select a collection to display.

Powered by Squarespace                            

Privacy Policy